Retouching product photos is a cakewalk. You take to Photoshop, have the RGB Color mode checked, create a new path, if need be, use the Pen Tool, add some Transforming and Cloning moves, set the Layer Mode to Multiply, follow a few more intricate steps here and there, and voila! You have perfectly retouched photos.
A little too much to handle? You bet! Clicking product photos is one thing, and retouching the ones you finally capture is another. The only common thread here and a strong one at that is the need for absolute perfection. And while there are some techniques that you could take to, if you are to retouch any or all of your photos, or remove background from product image, do keep in mind that they say “prevention is better than cure” for a reason. So, it’s better to get the photos right, and invest little to no time (and of course resources) in retouching and/or editing.
But the million-dollar question is, what’s with all the fuss? Why does everyone keep telling you to opt for product image editing services? Here’s your answer:
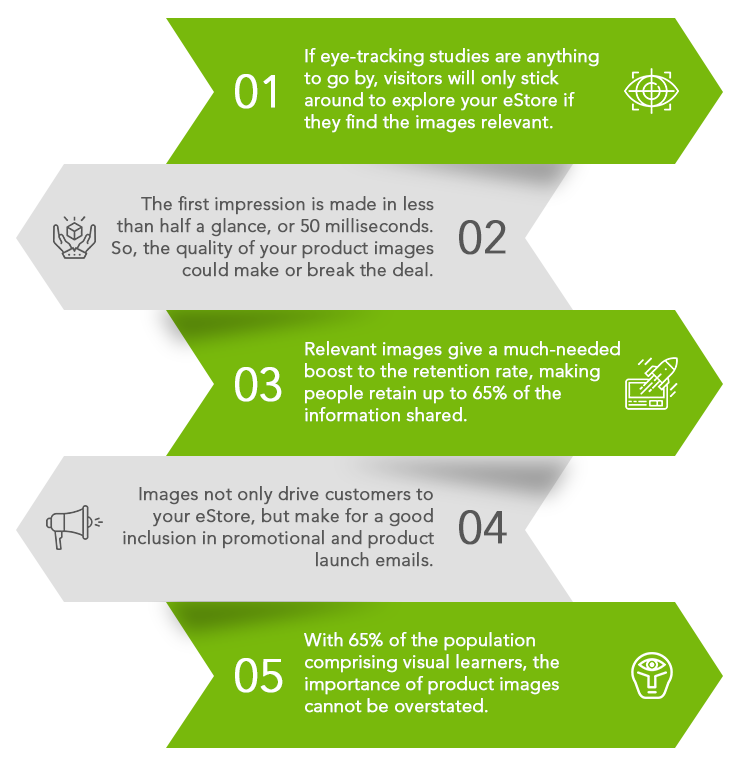
(Sources: HubSpot, Shopify. ResearchGate, and SSRN)
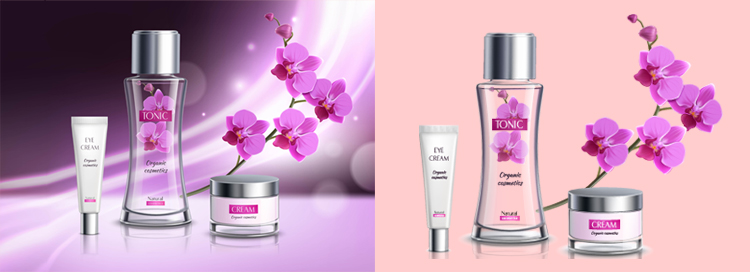
Coming back to retouching, well, if you are already stuck with some photos that could make use of it, here are some of your options. And don’t get us wrong, for we are making it sound like retouching is a bad move. No, it’s not. If anything, it could give a new lease of life to otherwise unconvincing photos. So, we are all for it!
Frequency Separation
Frequency Separation ensures that you are in complete control of the editing process. You get to create your own layers, and edit color and texture separately, and can therefore easily expect enticing photos once you are done. There’s a catch though. Whatever is done under the layers may not show up in the final image, thereby compelling you to start from scratch, should you require to make some changes. Hence, there’s this underlying need to opt for product image editing services, because an expert knows whether it makes sense to use FS for your product photos in the first place, or will applying curves adjustment or any other technique would suffice.
Dust and Scratches
If those tiny specs of dust have been bothering you, you can simply take to Photoshop (Filter > Noise > Dust & Scratches), and get rid of them.. Easier said than done? To some extent, yes. Take for example, a pair of suede shoes. Now if you were to remove specs of dust here, make no mistake, you’ll have a hard time doing it. Again, an expert would be in the know, and won’t make an attempt, to begin with.
Bonus tip: Did you know that you could easily get customers to sit up and take notice by adding dust and scratches to your product photos? Yes, you read that right. While your competitors are tossing these out for good, you can willingly choose to add a vintage effect of sorts. That said, do it for your own eCommerce store or website, and not for marketplaces like Amazon and eBay because they have their predefined image requirements, and may not accept product photos enhanced using such effects.
Here’s another one: When you reach out to our product photo enhancement experts, do not forget to ask them to combine multiple dust overlays, if you’d prefer uploading rather realistic photos to your eStore.
Liquify
This one could be your masterstroke. You can use it to straighten edges, ensure that your logos and text are well aligned, and whatnot. Or so it seems. What if you begin to notice hard dips in the lines while you are at it? What would you do? Not to mention, someone who knows the drill can easily figure out that the brush size being used is too small or perhaps the pressure is way too high, but the more pressing issue is (pun intended), can you? For all you know, you could have been misusing this amazing tool all this while.
Dodge & Burn

Yet another tool to get your hands on nearly perfect product photos, and to tell you the truth, it works wonders. However, it has its fair share of loopholes, which if not handled well, can cost you dearly. You could, for starters, fall prey to pixel peeping, and unless you have had some decent exposure and know by now that if you keep two windows open, with the first one zoomed in and the second zoomed out, this could eat up a lot of your time. And then there’s this rookie mistake that most of the inexperienced photo editors make, of dodging a lot more dark areas that they ideally should, inadvertently causing a somewhat unrealistic luminosity. Benefits galore, agreed, but so do the shortcomings, which, at the risk of sounding trite, an expert would know how to avoid.
Bonus tip: While it’s common to use Dodging & Burning to achieve contrasty images, not many people know that it could also come in handy while changing shapes.
Background Removal
If you have access to the Creative Cloud Suite, and hence the highly-talked-about Magic Wand, it surely is tempting to take the matters into your own hands. And as and when you do, you can easily prep up your images for background removal by duplicating the background layer and selecting the general shape. But can you also specify the selection so as to ensure that you don’t end up selecting the background as well? Because if you can’t, there’s no way you can proceed any further. Worry not, for we can come to your rescue.
When all is said and done, there’s no denying the fact that if you take better pictures, photo retouching or edit can help you take your product photos to a whole new level, rather than merely helping you fix the mistakes you make. So, here are some tips that you could follow the next time around.
- Make the most of a white background. Create flatlays, if need be, but make sure your products stand out.
- Literally write down a list of gear you’d need, including of course your camera. Now, it’s easy to miss out on something as trivial as a tether cord or something far more important, say, a diffuser, which could help ensure that you get to use natural light to your advantage. So, without further ado, start writing.
- Make sure you have the accessories handy. Right from safety pins and glue dots, which you could use to keep the products in place, to a fishing line that can do wonders if you are to hang a product but of course don’t want to shift the focus off of it, everything you may need should be readily accessible.
- No shortcuts. To be able to make up for the lack of tactile experience, you need a studio shot, a lifestyle shot, a scale shot, a detail or close-up shot, a group shot, a packaging shot, and finally, a process shot, one that would highlight your workmanship. Click each of these to be able to build up a narrative.
- Learn the ticks of the trade. For instance, you should know how to use a piece of white paper to get rid of the horizontal line, which could otherwise be your worst nightmare. Similarly, if you were to choose between triadic and analogous color combinations, you ought to understand the difference between the two, so to speak.
- Use the right props. From a vintage typewriter to a burlap filled frame, just about anything could be used as prop. But then, do keep in mind that you shouldn’t use a prop for the sake of it, or merely because your competitors are using one. Unless it complements the product being photographed, a prop could do you more harm than good.
- More importantly, familiarize yourself with the do’s and don’ts. It is okay, for example, to place your products above a reflected surface if you are trying to add a dash of depth, however, flouting the rule of thirds is a big no-no, more so because it can take a toll on your product photography composition.
- Last but not least, don’t let get of the basics, especially if you want to streamline your workflow. You could, for example, keep those distracting lens flares at bay by investing in a great lens hood (Canon EW-63C, Canon ES-68, etc.). And if you feel that your product photos always seem to lack the coveted vibrancy that could help cut through the noise, be sure to use a polarized filter (Nikon, Gobe, Tiffen, etc.).

Bonus tip: If you don’t like playing by the rules, worry not, for you can try out the dynamic diagonal compositional technique, a technique that involves lines. And who’s to say, you won’t be getting equally good results, if not better by using lines to lay emphasis on the most important part of your photographs?
Wrapping Up
To cut a long story short, product photo editing holds great importance, and is better left to professionals, those who know their way around the tools to be used, have had a successful tryst with product photo enhancement projects, and more importantly bring years of experience to the table. Luckily for you, professionals at QuikTek Info Services fit the bill perfectly. Write to us as mail@quiktekinfo.com, sharing a brief of what kind of requirements you’d expect us to cater to, and we’ll connect you with one as soon as possible.
Happy Clicking!